

How To Turn Off Auto Split On CapCut Mobile (iOS & Android)
For New Projects
- Open CapCut on your phone.
- Tap “New Project” and pick the video you want to edit.
- Before you hit “Add” to import the video, look for the auto split toggle. It’s usually in the bottom-left corner or under a small “Advanced Settings” icon. You might see labels like “Auto split by beat” or “Auto split by scene.”
- Toggle those options off. Make sure they’re grayed out, not blue.
- Now tap “Add” to import your footage. It won’t be split automatically anymore.
For Existing Projects, If Auto Split Already Happened
1.Open your ongoing CapCut project
2.Find the clips that got split by accident. You’ll see small lines between them, sometimes with “beat” or “scene” tags.
3.Press and hold one split clip, then tap the others to select all the parts you want to merge. Or drag your finger across them to select multiple.
4.Look for the “Merge” button (it usually has two overlapping squares as an icon) and tap it. The split clips will turn back into one.
5.To stop auto split from happening again, tap the gear icon Project Settings in the top-right corner. Find the auto split options and toggle them off.
6.Pro tip: If you can’t find the auto split toggle, check under the “Audio” tab—some CapCut versions hide it there.
How To Turn Off Auto Split On CapCut Desktop (Windows & Mac)
- Open CapCut Desktop and import your video. You can drag and drop the file into the media library or click “Import” to select it.
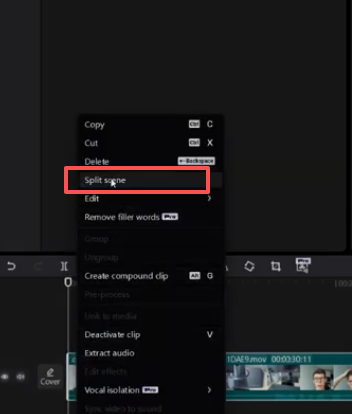
- Right-click on the video clip (either in the media library or on the timeline below).
- Look for the “Auto Split” option in the dropdown menu. Uncheck it—this turns off auto split for that clip.
- If you want to turn it off for all future projects, go to “Preferences” Click on “Editing” and uncheck “Enable auto split for new projects.” Then click “Save” to confirm.
Troubleshooting: Auto Split Won’t Turn Off
Issue 1: Auto Split Toggle Is Grayed Out
- Right-click the clip and select “Unlock”.
- Look for a “Quick Edit” button in the top-right corner. Click it to switch to “Pro Edit” mode—this unlocks all settings.
Issue 2: Turning Off Auto Split Doesn’t Work
- Close CapCut and open it again. Sometimes the app just needs a restart.
- Clear the app cache. On mobile, go to your phone’s Settings → Apps → CapCut → Storage → Clear Cache. On desktop, go to Preferences → Storage → Clear Cache.
- Update CapCut. Old versions can have glitches. Go to the ? CapCutModa to download the latest version.
- Re-import the footage. Sometimes the original file gets corrupted during import. Delete the clip from your project, re-import it, and try turning off auto split again.
Issue 3: Accidentally Split Footage—How To Merge It
If you messed up and split a clip by accident , merging is easy:
– On mobile: Select all the split parts that hold one, tap the others, and tap “Merge.””
– On desktop: Drag to select the split clips on the timeline, then click the “Merge” button in the top toolbar.
Pro Tips: When To Keep Auto Split On (And Manual Split Hacks)
- Making TikTok/Reels videos that need to sync with music beats. Auto split will line up your clips with the song perfectly.
- Editing long raw footage . Auto split breaks it into smaller, easier-to-edit chunks.
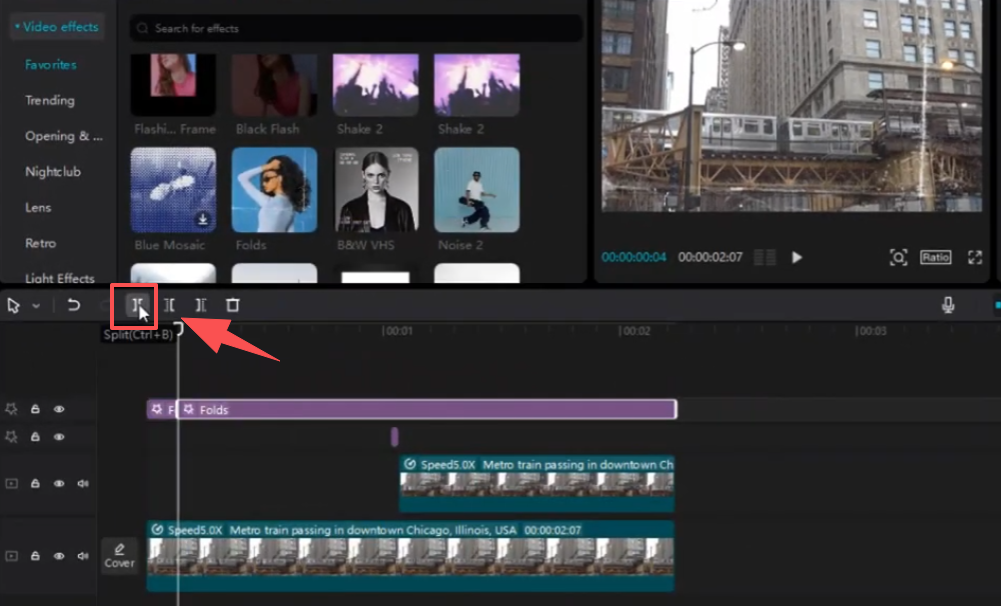
- When you need precise control, use manual split instead. Here’s how:
- Mobile: Tap the clip to select it. Drag the playhead, the white line that shows where you are in the video, to the spot where you want to split. Then tap “Split.”
- Desktop: Use shortcut keys—Ctrl+B for Windows, Cmd+B for Mac. Move the playhead to the right spot and press the shortcut to split instantly.


