

This guide will explain in detail how to adjust the pitch in CapCut and will also cover the fade-in-text cap cut function. Mastering these skills will significantly improve the quality of your videos, making them more attractive and professional.
Now I will get straight to the point.
Changing Voice Pitch in CapCut
Altering the pitch of a voiceover or audio clip is a powerful way to create character voices, add drama, or even maintain anonymity. Here’s how to do it on both desktop and mobile.
On Capcut PC:
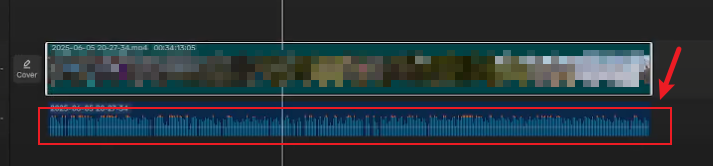
- Import and Select: Start a new project and import your video or audio file into the timeline. Select the clip you want to edit.
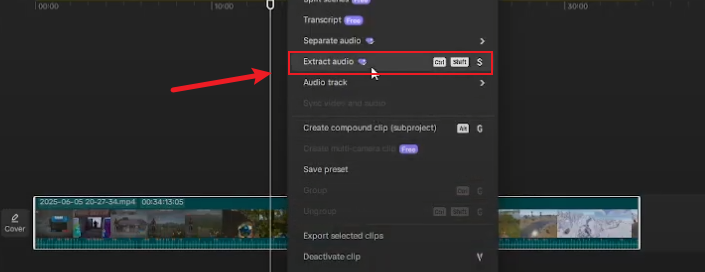
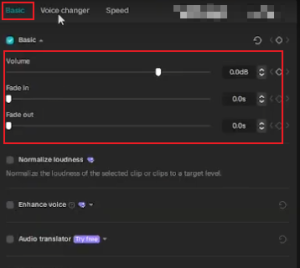
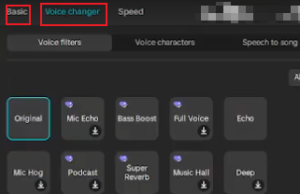
- Access Audio Tools: In the editing menu on the right side of the screen, click on the “Audio” tab. Then, navigate to the “Voice changer” section.
- Adjust Pitch and Timbre: You will find sliders for “Pitch” and “Timbre”. Move the Pitch slider to the right to make the voice higher or to the left to make it deeper. Adjust the Timbre slider to fine-tune the sound quality.
- Use Voice Characters (Optional): For quick transformations, you can skip the sliders and choose from preset “Voice characters” like Robot, Child, or a deep tone, which automatically adjust the pitch for you.
- Export: preview the clip and export your project.
On Mobile:
The process is very similar. After importing your media and selecting the clip on the timeline, tap on the “Voice” icon (or sometimes the “Audio” tab) at the bottom. This will open a menu with a pitch slider. Slide it left or right to adjust the pitch to your liking.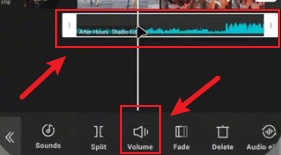
You can also choose the Voice Characters; you don’t need to adjust it yourself.
Creating fade in text capcut
Fades are essential for smooth openings, closings, and transitions. You can achieve this in two main ways.
Using faded capcut edit Preset Animations (Easiest Method)
- Add Your Text: Tap the “Text” option in the bottom menu, click “Add Text,” and type your content.
- Apply Animation: With the text layer selected, tap on “Animation”. You will see three categories: In, Out, and Loop.
- Choose Fade Effect: For a fade in, select an “In” animation like Fade In or Dissolve In. For a fade out, choose an “Out” animation like Fade Out.
- Adjust Duration: Use the slider to control the speed of the fade animation, making it quicker or more gradual.
- Preview and Export: Play the timeline to preview the effect. Once it looks good, export your video.
Using keyframe CapCut for Custom Control capcut fade in fade out
For ultimate control over the timing and nature of the fade, keyframes are your best tool.
- Add Text and Select: Place your text layer on the timeline and select it.
- Find the Opacity Setting: In the text editing options, look for the “Opacity” parameter.
- Set Starting Keyframe: Move the playhead to where you want the fade to begin. Click the “Add Keyframe” icon (usually a diamond shape ✦) to place your first keyframe. At this point, set the opacity to 0% for a fade-in start.
- Set Ending Keyframe: Move the playhead to where you want the fade to be complete. Change the opacity to 100% for a full fade-in. CapCut will automatically create a new keyframe, and the opacity will smoothly transition between the two points.
You can reverse these values (100% to 0%) to create a fade-out. The true power of keyframes is that you can place them anywhere, creating complex fade sequences that preset animations cannot.
Pro Tips for Polished Edits
- Smoother Animations: When using keyframes for movements or fades, avoid jerky motion by using the “Ease In” and “Ease Out” options if available. This makes the animation start and end gradually, mimicking natural movement.
- Plan Your Keyframes: Before adding keyframes, think about the motion path or effect you want. A little planning results in smoother animations and a cleaner timeline.
- Less is More: Especially with text animations, simplicity often has more impact. A clean fade is usually more professional than an overly complex combination of effects.
Answers to Common Questions
Q: Can I change the pitch for only a specific part of my video?
A: Yes. Use the “Split” tool (scissors icon) to cut the audio clip at the points where you want the pitch change to start and end. Then, apply the pitch adjustment only to that specific segment.
Q: Why does my text fade animation look choppy?
A: This can happen if the duration of the animation is too short. When you select a fade animation, a duration slider appears. Try lengthening the duration for a smoother, slower fade.
Q: What’s the difference between changing ‘Speed’ and ‘Pitch’?
A: Simply speeding up or slowing down a clip (using the Speed option) also raises or lowers the pitch. The Voice Changer tool is different because it adjusts the pitch independently of the speed, preserving the original tempo of your audio.
Have you mastered changing the pitch and fading capcut edits in Capcut?
Make good use of keyframes to implement capcut fade-in and fade-out functions. I hope this guide helps you master these creative techniques in CapCut.


