
Whether you are protecting personal privacy, hiding sensitive information, cleaning up messy backgrounds, or simply directing viewer focus, being able to selectively obscure parts of your footage is an essential editing skill. For years, professional blurring required expensive software and advanced technical knowledge, but CapCut has simplified the entire process into intuitive, one-click tools.
In this complete guide, we will break down how to blur in capcut for every common scenario: how to blur face in video with AI tracking, how to blur a specific area in capcut with precision masking, and how to add blur background in capcut for a clean, cinematic look.
Why Blur Matters: Common Use Cases for Every Creator
Before jumping into step-by-step tutorials, it helps to understand when and why you would use blurring effects in your videos. These tools solve real-world editing problems that nearly every creator encounters:
- Privacy protection: Blur faces, license plates, and identifiable details in street footage, interviews, vlogs, and public recordings to comply with privacy rules.
- Sensitive information: Hide phone screens, documents, addresses, passwords, or personal data that accidentally appears on camera.
- Visual cleanup: Blur distracting backgrounds, cluttered rooms, or unwanted objects to keep viewers focused on your main subject.
- Cinematic styling: Add depth-of-field effects to make your subject pop, mimicking professional camera bokeh without expensive lenses.
If you’ve read our previous guide How to Blur Words on Videos in CapCut PC, you already know how to block sensitive text like phone numbers and usernames; today we’ll expand on those skills to cover faces, custom zones and blurred backgrounds.
Blur Face in Video With Automated AI Tracking
One of the most common reasons editors reach for blur tools is to protect people’s identities. Manually following a moving face with a blur box is tedious, but CapCut’s AI-powered tracking makes it simple to blur face in video footage with just a few clicks.
Steps to auto-blur faces
- Import your clip to the CapCut PC timeline and select the footage.
- Navigate to the Effects panel and search for Face Blur in the video effects library.
- Drag the face blur effect onto your clip on the timeline. The tool will automatically detect faces in the frame.
- In the effect settings panel, adjust the blur strength and choose between soft blur or mosaic style based on your privacy needs.
- Preview the full clip to confirm the blur follows faces smoothly through movement. For fast-moving shots, add manual keyframes to fine-tune positioning frame by frame.
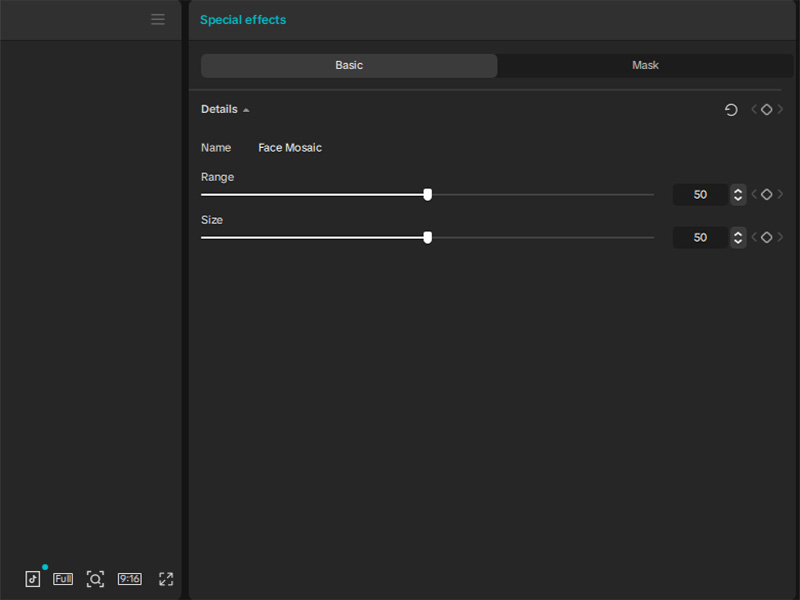
This method works perfectly for street vlogs, event highlights, public interviews, and any footage featuring unconsenting participants.
How to Blur a Specific Area in CapCut
For elements that aren’t faces, like address labels, brand logos, account numbers, or unwanted objects in the frame — you’ll need to target a precise zone. Learning how to blur a specific area in CapCut gives you full control over what stays visible and what gets hidden, with far more precision than a basic full-screen effect.
Steps for precise area blurring
- Add your preferred blur or mosaic effect to the timeline on a track above your video clip.
- Select the effect layer, then open the Mask menu in the upper-right settings panel.
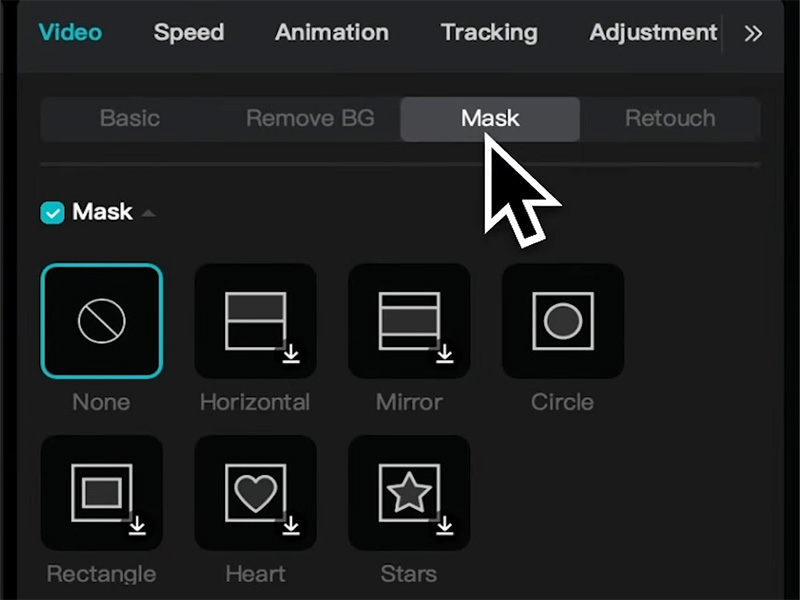
- Choose a shape to match the shape of the area you want to hide.
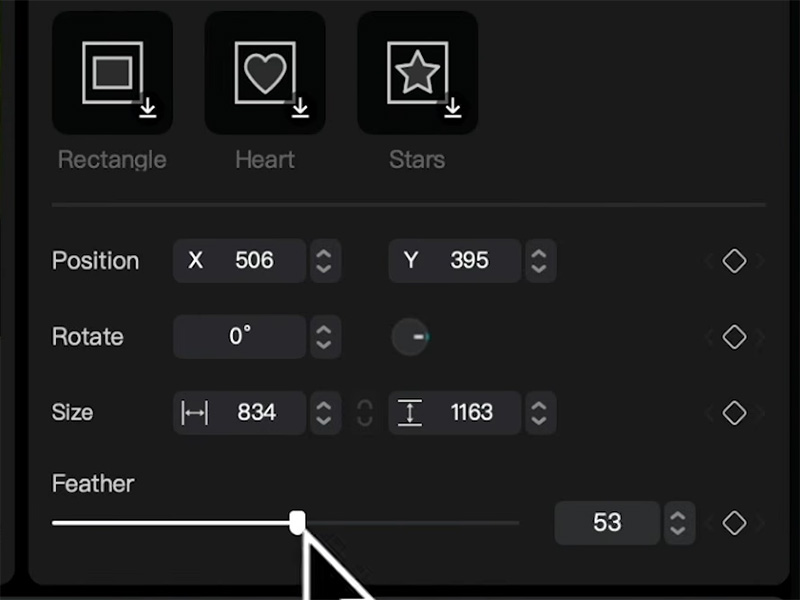
- Drag and resize the mask to cover your target area completely. Use the feather slider to soften the edges of the blur for a more natural, less jarring look.
- For moving targets, add keyframes to the mask position at different points in the timeline so the blur follows the object smoothly across the frame.
For small, detailed areas like ID numbers or tiny logos, zoom in on the preview window to align the mask perfectly and avoid leaving any visible edges.
How to Add Blur Background in CapCut
Blurring isn’t just for hiding things; it’s also a powerful stylistic tool. If you want to elevate talking-head clips, product demos, or social media reels, knowing how to add blur background in CapCut lets you create a cinematic depth-of-field effect that keeps viewers focused on your main subject, no professional camera required.
There are two easy ways to do this on desktop:
Method 1: One-click AI background blur
- Select your video clip directly on the timeline.
- Go to the Background panel in the right-hand menu.
- Choose the Blur option. CapCut will automatically isolate the main subject and apply blur to the surrounding background.
- Adjust the blur intensity slider to get the depth you want; subtle for a natural look, strong for a dramatic bokeh effect.
Method 2: Manual background blur
- Duplicate your video clip and place the copy on a track above the original.
- On the top clip, use the Cutout tool to isolate your main subject.
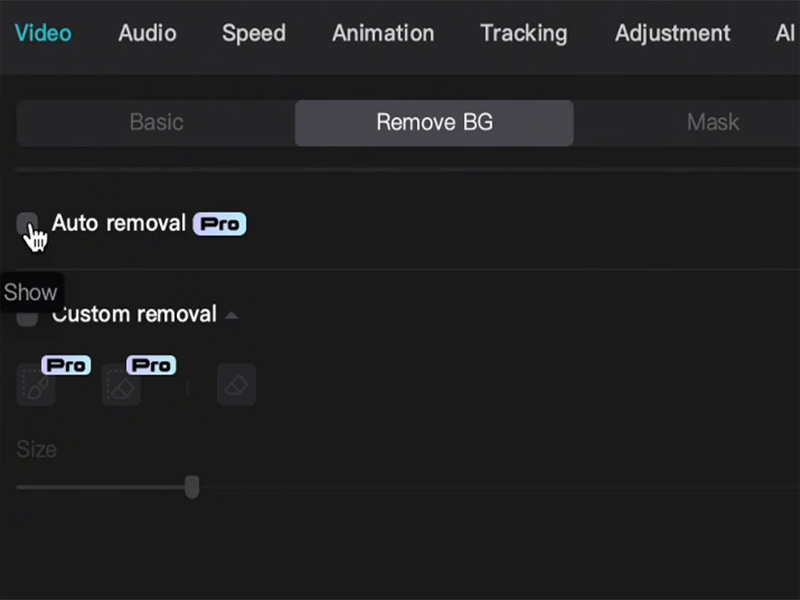
- Apply a strong blur effect to the bottom original clip.
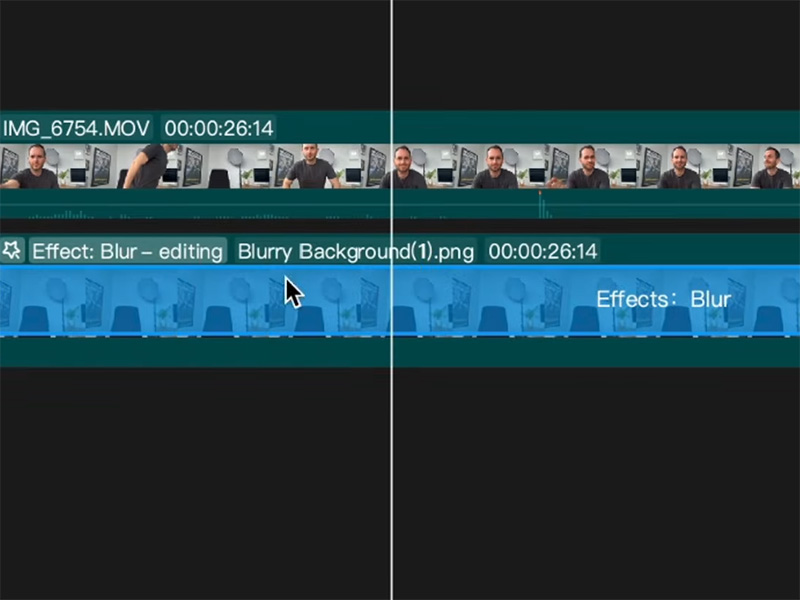
- Fine-tune the edge feather of the cutout to blend the subject smoothly into the blurred background.
This technique is ideal for talking-head videos, product showcases, Instagram Reels, and TikTok tutorials where you want a clean, professional look without filming on a plain backdrop.
Pro Tips for Polished, Natural Blur Results
A good blur effect should feel invisible to viewers. It should hide what it needs to without drawing extra attention. Keep these tips in mind for clean results:
- Match style to purpose: Use soft gaussian blur for backgrounds and minor distractions, and mosaic for high-privacy areas like faces or ID numbers.
- Always feather edges: Hard, sharp blur borders look unnatural. A small amount of feathering helps the blurred zone blend into the rest of the frame.
- Test at full playback speed: Don’t only check frame by frame. Play the clip at normal speed to make sure tracking stays smooth and no content flashes through.
- Keep intensity consistent: If you’re blurring multiple areas or faces in one video, use the same blur strength and style for a cohesive, professional look.
- Preview at export resolution: Low-resolution previews can hide gaps. Zoom to full size before exporting to confirm all sensitive content is fully covered.
Final Thoughts
CapCut’s editing tools go far beyond simple text obscuring. Whether you need to blur face in video footage, target a precise spot, or create a soft cinematic background, the platform gives you all the controls to edit quickly and get professional results.
You don’t need expensive software or years of editing experience to protect privacy, clean up your footage, and elevate your video style. For creators of every skill level, CapCut makes hiding unwanted elements surprisingly straightforward. So you can spend less time editing and more time focusing on your content.