

Many creators initially chose to edit videos on their phones because it was quick and convenient, especially when using tools like CapCut for Android. However, as projects grow larger, editing on a computer usually offers a smoother experience, more storage space, and a larger screen, making it easier to make more precise adjustments.
Users are often concerned about quality loss during transmission. They often worry about video compression, loss of effects, or project files not opening properly on other devices.
The good news is that CapCut offers multiple methods to transfer projects from your phone to your computer while maintaining the integrity of the original media files and editing data. We have explained how to transfer a CapCut Project from PC to Phone before. This guide will introduce best practices to help you choose the method that best suits your workflow.
Why Move CapCut Projects to a PC?
While CapCut Mobile is capable of handling quick cuts and short video content creation, many creators eventually find that editing on a computer is more practical. For users who first started editing after a capcut ipad download, transferring projects to a PC or Mac can be a natural next step. Moving projects to a computer can improve efficiency, provide better control over editing, and make it easier to handle large video files.
1. Better Editing Performance
As projects become increasingly complex, mobile devices may struggle to maintain smooth operation. Projects that include multiple video layers, high-resolution footage, animations, filters, and transitions require powerful processing capabilities. PCs typically have more powerful hardware, which can speed up timeline loading and make playback and editing smoother.
2. Larger Screen for Precise Editing
A larger display screen allows editors to see every part of the project more clearly. This makes it easier to spot subtle errors, precisely align segments, adjust keyframes, and fine-tune transitions. Tasks such as subtitle editing, color adjustment, and audio synchronization are generally more comfortable on a desktop computer monitor than on a mobile phone screen.
3. More Storage Capacity
Modern video projects can take up several gigabytes of space, especially when working with 4K footage. Mobile phone storage space is limited, and large projects will quickly fill up the available space. By transferring projects to a computer, users can store materials, project files, and exported videos without constantly worrying about running out of storage space.
4. Easier File Organization
Managing dozens of video clips, images, music tracks, and project versions on mobile devices can become very difficult. Using a computer, you can easily create organized folders, archive old projects, and quickly find specific files. This is especially useful for creators who frequently produce content for multiple platforms.
5. Improved Multitasking
Desktop environments make it easier to use multiple applications simultaneously. For example, you can edit videos in CapCut while browsing references, managing media files, writing video descriptions, or creating thumbnails. This workflow can save a lot of time compared to frequently switching between apps on a phone.
Understanding What Needs to Be Transferred
Before moving a project, it helps to understand what a CapCut project contains.
A complete project usually includes:
- Original video clips
- Photos
- Audio files
- Effects references
- Text layers
- Project timeline data
- Editing settings
Simply transferring the final exported video is not the same as transferring the project itself.
Exported Video vs Project File
| Type | Can Continue Editing? | Keeps Timeline? | Keeps Original Assets? |
| Exported Video | No | No | No |
| Project File | Yes | Yes | Yes |
If you want to continue editing on a PC, you must transfer the project rather than only the rendered video.
Method 1: Use CapCut Cloud Space
Cloud synchronization is one of the simplest methods to achieve project transfer between devices.
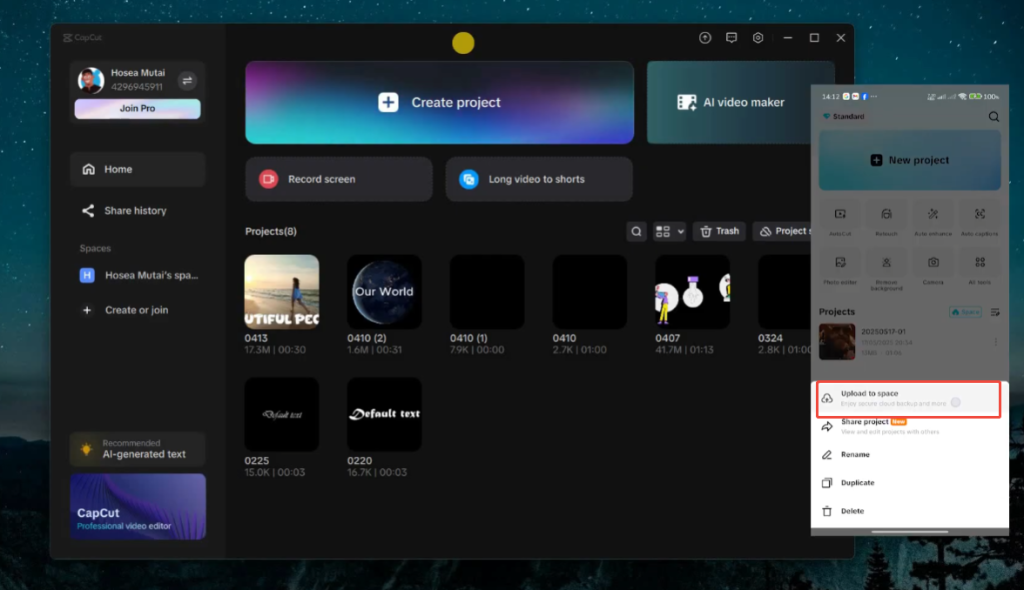
Step 1: Open CapCut on Your Phone
Launch the application and locate the item you want to transfer.
Step 2: Upload the Project
Choose the cloud backup or sync option, and then wait for the upload process to complete.
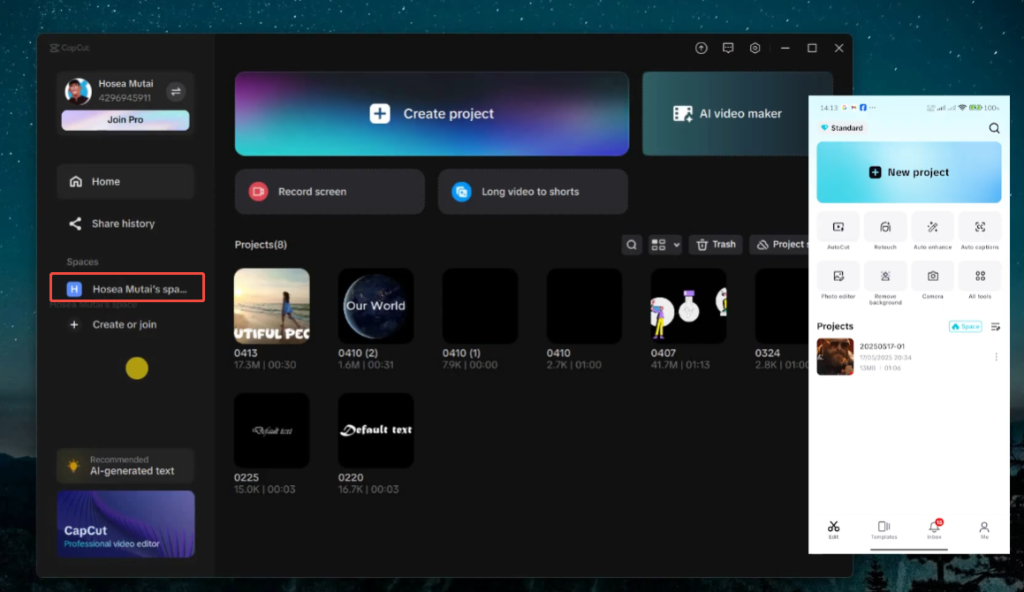
Step 3: Sign In on PC
Open CapCut Desktop and log in to the same account.
Step 4: Access the Project
After synchronization completes, the project should appear in your cloud workspace.
Advantages
- No cables required
- Fast access across devices
- Easy project management
- Keeps project structure organized
Best For
Users who frequently switch between mobile and desktop editing.
Method 2: Transfer Project Files Through USB
USB connections provide a direct data transfer path and are typically faster for large projects.
Step 1: Connect Your Phone to the Computer
Use a USB cable and allow your phone to access the files.
Step 2: Locate CapCut Project Data
Open the device’s storage and locate the folder used by CapCut.
Step 3: Copy Project Folders
Transfer the project folders to your PC.
Step 4: Import Into CapCut Desktop
Open CapCut on the computer and load the transferred project files if supported by your version.
Advantages
- Fast transfer speed
- No internet required
- Suitable for large files
Best For
Creators working with long videos and high-resolution footage.
Method 3: Transfer Through Shared Storage Services
Cloud storage services can also be used to move project materials.
Common options include:
- Google Drive
- Dropbox
- OneDrive
Workflow
- Upload project files from the phone.
- Download them on the PC.
- Import them into CapCut Desktop.
Best For
Teams or creators working on multiple devices.
Method 4: Use Local Wi-Fi Transfer
Some users prefer to transfer files wirelessly within the same network.
How It Works
Both devices connect to the same Wi-Fi network.
Files can then be transferred through:
- Nearby sharing tools
- Wireless transfer applications
- Network folders
Advantages
- No cables needed
- Faster than some cloud uploads
- Convenient for home use
Best For
Users who regularly transfer media between personal devices.
How to Keep Original Video Quality
Maintaining video quality during project transmission is key to preserving the original files, especially when working with capcut for pc, where high-resolution footage and editing assets need to remain intact. If only a compressed copy is transmitted, the final exported video may not be as clear as the original material, leading to reduced sharpness and overall visual quality.
1. Transfer Original Media Files
Move the original video, photo, and audio files, along with the project files, whenever possible. The original file retains its full resolution and detail, resulting in the best editing results on a computer.
2. Avoid Multiple Exports
Instead of exporting a video on your phone and editing that exported file again on your computer, transfer the project itself. This allows you to continue working from the original timeline and media assets.
3. Keep Files Organized
Store all project materials in a dedicated folder and avoid renaming or moving them after transfer. A consistent folder structure helps CapCut correctly locate files and prevents media files from being lost.
4. Use High-Quality Export Settings
After completing the editing on your computer, select export settings that match the source footage, such as the original resolution and frame rate, to obtain the best final quality.
Best Workflow for Professional Editing
Many creators use the following workflow:
- Record footage on a phone.
- Create a rough edit in CapCut Mobile.
- Upload or transfer the project.
- Continue editing on CapCut Desktop.
- Add advanced effects, subtitles, and adjustments.
- Export the final video from the PC.
This approach combines the convenience of mobile editing with the power of desktop production.
Conclusion
Transferring CapCut projects from a phone to a computer does not necessarily result in a loss of image quality. The key is to transfer the entire project and its original media files, not just the exported video. After completing your capcut download pc setup, you can move the project folder and source files to your computer, allowing CapCut to preserve the original resolution, effects, and editing data for a seamless workflow across devices.
For convenience, CapCut cloud service is usually the simplest option. For large-scale projects, USB offers fast transfer speeds and good stability. Shared storage services and local Wi-Fi transfers also offer flexible alternatives, depending on your workflow.
By keeping the original footage intact and maintaining an organized project folder, you can continue editing on your computer while ensuring the full quality of the video.


