Adding a whooshing sound effect at the beginning of a video is one of the simplest ways to make it more dynamic and professional, especially when combined with Keyframe Animation to control timing, motion, and visual impact. It is often used in YouTube intros, TikTok transitions, Reels short videos, and other short video clips that need to instantly grab the viewer’s attention.
The good news is that CapCut makes it very simple once you master the setup and fine-tuning techniques.
Here is a concise and clear implementation method.
What Is a Whoosh Effect?
A whoosh is a short, sharp sound that mimics the rapid movement of an object through the air. You’ve probably heard it countless times without even realizing it—it’s in movie trailers, YouTube intros, TikTok transitions, and even TV commercials. It is this rapid “whoosh,” “whoosh,” or “whistling” sound that makes a moment seem full of vitality and meaning.
In video editing, whooshing sounds are often used to draw the viewer’s attention. It tells the brain, “Something is changing,” or “Pay attention, this part is important.”
Different Types of Whoosh Effects in CapCut
Not all whooshing sounds are the same; using the wrong effect can make the editing sound stiff or overdone. CapCut has a variety of built-in whooshing sounds, each suitable for different types of motion and video atmospheres. Understanding the differences between them will help you choose the right effect, instead of just grabbing one that sounds “cool”.
Fast Whoosh Effects
Fast whooshes are short, sharp, and very noticeable. They usually last less than a second and create a strong sense of speed.
These work best for:
Short video intros
Quick cuts and jump transitions
High-energy content like gaming clips or fast-paced tutorials
Because of their strong impact and high speed, they should be used with caution. If the sound is too loud or the frequency is too high, it can easily make the audience feel uncomfortable.
Soft Whoosh Effects
The softer whistling sounds are smoother and less harsh. They blend into the background rather than stand out.
These are a good choice for:
Vlogs and lifestyle videos
Travel clips
Calm or story-driven content
A gentle whistling sound is perfect for when you want to create a dynamic atmosphere without ruining it. They are also generally more forgiving in terms of rhythm and volume.
Cinematic Whoosh Effects
The howling sound in movies is usually deeper, wider, and more dramatic, and is often used in trailers or professionally produced opening sequences.
You’ll often see these used in:
Tech reviews
Product showcases
Documentary-style videos
Because high-speed shots in film often have a heavy, textured effect, they work best when paired with slow motion, such as with gentle zooms or fade-ins. Using such shots in fast-paced social media videos might seem out of place.
Reverse Whoosh Effects
Reverse whooshes build up toward a moment instead of hitting immediately. The sound rises and then stops or transitions into another clip.
They’re commonly used for:
Text appearing on screen
Logo reveals
Scene changes that need anticipation
Reverse whooshes are especially effective when you want to prepare the viewer for what’s coming next rather than surprising them.
Swipe and Transition Whooshes
These whooshing sounds are specifically designed for horizontal or vertical movement. They are typically matched to movements from left to right or from top to bottom.
They work well with:
Slide animations
Pan effects
Before-and-after transitions
Matching the direction of the whooshing sound with the direction of movement can make the editing feel more natural and deliberate.
How to Choose the Right One
When selecting the whooshing sound effect in CapCut, don’t just listen to the sound itself. Watch the video clip during the effect playback and ask yourself:
Does the timing feel natural?
Does the sound match the speed of the motion?
Is it supporting the edit, not distracting from it?
If the effect draws attention to itself instead of the video, it’s probably not the right choice.
Why Editors Use Whoosh Effects
Whoosh effects aren’t just about sounding cool. They serve a few practical purposes:
Create momentum
At the beginning of a clip, a whoosh helps pull the viewer into the video instead of letting it start flat or awkwardly.
Smooth hard cuts
If a clip starts suddenly, a whoosh can soften the transition and make it feel planned rather than abrupt.
Emphasize motion
When a video slides, zooms, or reveals text, the whoosh reinforces that movement and makes it feel more natural.
Add a professional touch
Even simple edits can feel more polished with the right sound design.
What a Whoosh Effect Actually Sounds Like
Whoosh effects come in many styles, but most fall into a few categories:
Soft whooshes – Clean, airy sounds used for minimal edits or vlogs
Fast swipes – Sharp and quick, common in short-form content
Cinematic whooshes – Deeper and heavier, often layered with bass
Digital whooshes – Synthetic sounds used in tech or gaming videos
The key difference lies not only in the sound itself, but also in the duration and volume of the sound. A good whistling sound usually lasts less than a second and will never distract the audience from the visual effect.
Whoosh Effect vs. Transition Sound
A lot of people think whoosh effects are only for transitions, but that’s not true.
A whoosh can:
Start a video
Introduce a new scene
Reveal text or a logo
Support a camera movement
In other words, it’s not a transition on its own, for it’s an audio cue that enhances whatever visual change is happening.
Why Whoosh Effects Work So Well at the Beginning of a Clip
At the very start of a video, viewers decide within seconds whether to keep watching. A subtle whoosh effect can:
Prevent the intro from feeling empty
Make the opening feel intentional
Add energy without needing music right away
That’s why so many creators use a light whoosh right before the first frame appears because it gently “pulls” the viewer into the video.
Step-by-Step: Adding a Whoosh Effect in CapCut
This guide walks you through the exact process of adding a clean whoosh effect at the beginning of a clip in CapCut. The steps work for both mobile and desktop versions, including CapCut Premium Unlocked, though some button names may look slightly different.
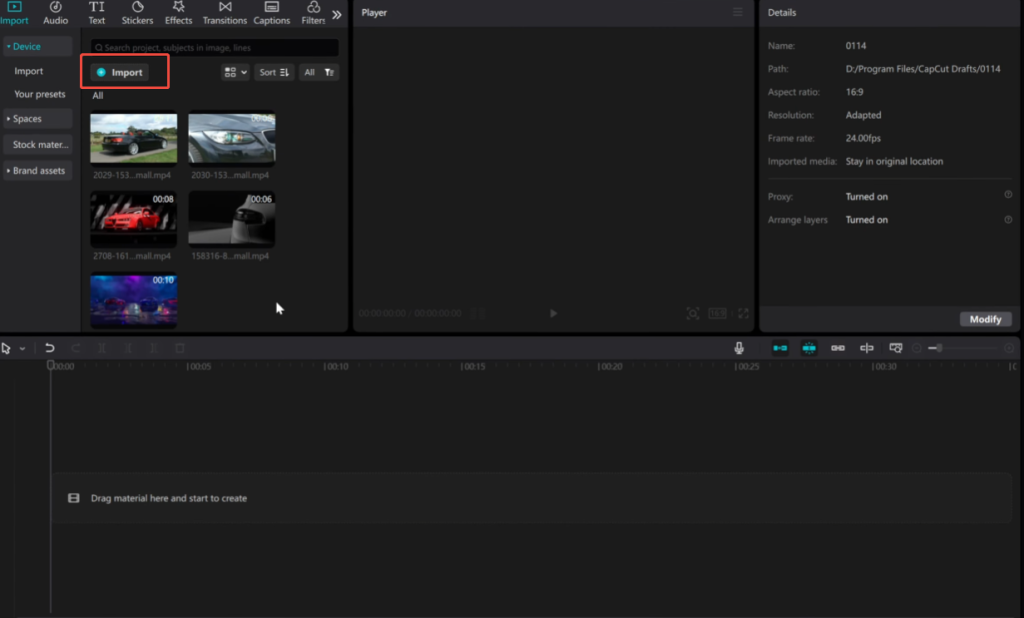
Step 1: Import Your Video Clip
Open CapCut and tap New Project.
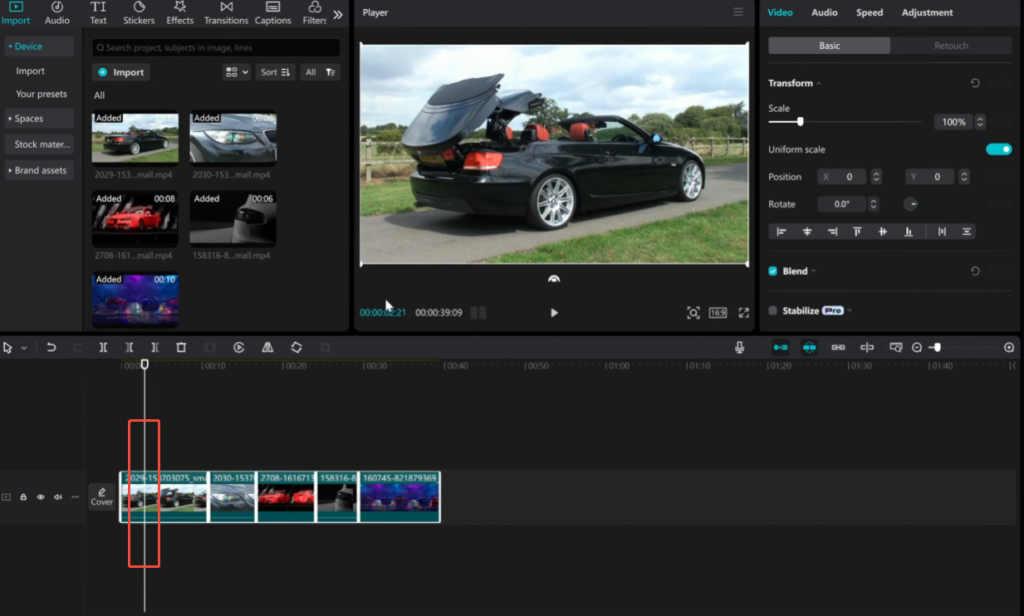
Select the video you want to edit and add it to the timeline.
Once the clip is loaded:
Make sure it starts at the very beginning of the timeline
Trim off any blank space or unwanted frames at the front
This is important because the whoosh effect depends heavily on precise timing.
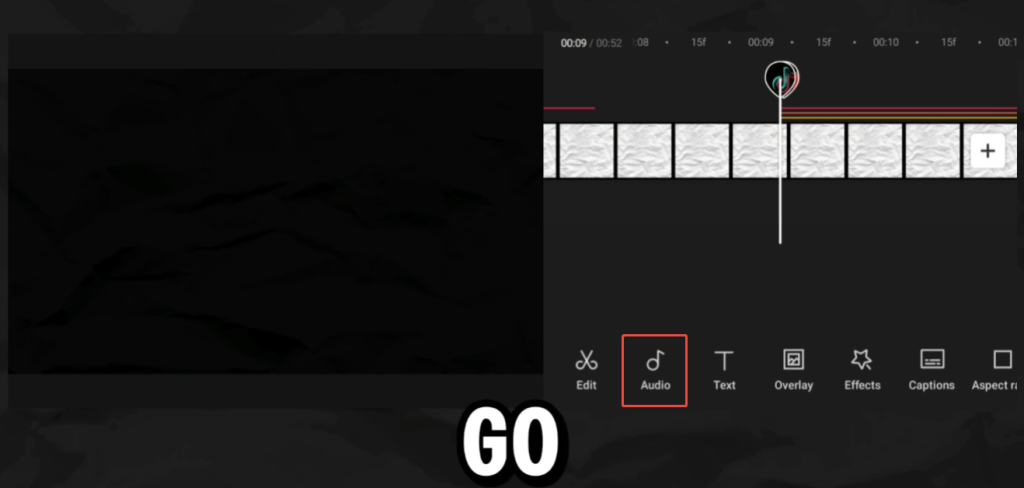
Step 2: Zoom In on the Timeline
Before adding any sound, pinch to enlarge the timeline.
A magnified timeline allows you to:
place whirring sounds more precisely
align sound precisely with the first frame of the video
avoid awkward delays or sounds that are too late
This small step has a huge impact on the professionalism of the final result.
Step 3: Open the Sound Effects Library
Tap Audio at the bottom of the screen, then choose Sound Effects.
In the search bar, type keywords such as:
Whoosh
Swoosh
Swipe
Transition
Fast move
Preview a few options using headphones if possible. Look for a whoosh that feels short, clean, and not overly aggressive.
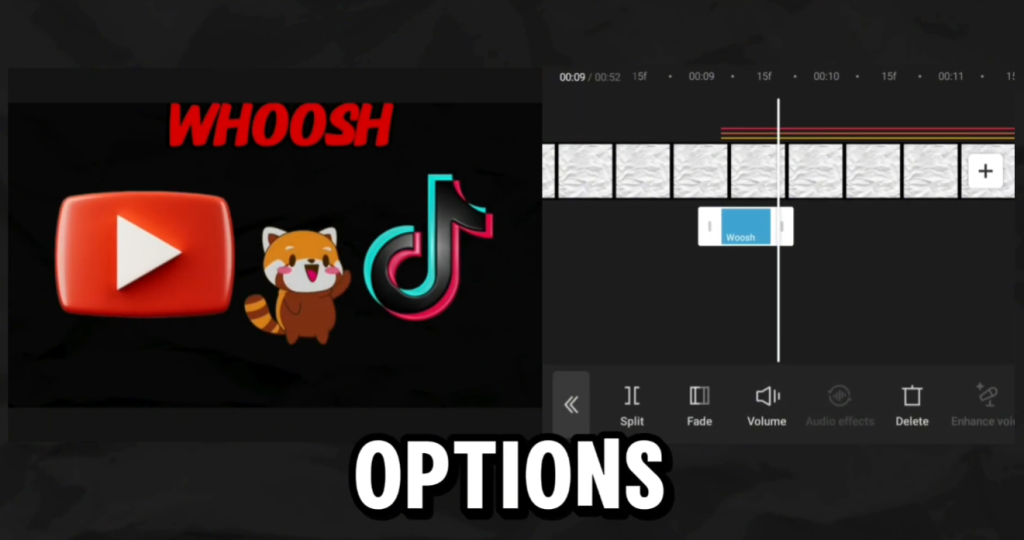
Step 4: Add the Whoosh Effect to the Timeline
Once you find a suitable sound:
Tap Add
The sound effect will appear on a separate audio track
Now drag the whoosh so that:
The main peak of the sound hits right as the video begins
The sound starts slightly before the first frame
This creates a smoother, more natural entrance.

Step 5: Trim the Sound Effect
Click on the whooshing sound clip on the timeline and trim it as needed.
Most whooshing sounds are best when:
short and concise
compact and focused, without any unnecessary trailing sounds
If the sound feels too long, cut off the end instead of the beginning.
Step 6: Adjust Volume and Fading
After selecting the whooshing sound:
Go to volume settings
Adjust the volume to around 60% to 80%, the exact value depending on your main audio volume.
If available, please add a slight fade-out effect to prevent the sound from abruptly ending.
The goal is to make the whooshing sound sound smooth and natural, rather than harsh and abrupt.

Step 7: Preview and Fine-Tune
Play this video repeatedly from the beginning.
Ask yourself:
Is the timing of the sound appropriate?
Is the sound and visuals harmonious and natural?
Is the sound clear enough to hear without being distracting?
If something feels off, you can adjust the position of the sound slightly, moving it a few frames left or right. Subtle adjustments are crucial.
Optional Step: Match the Whoosh With Motion
To make the effect more realistic, add some subtle dynamic effects to the video clip:
Click “Animations” → “Insert”
Choose a gentle slide or zoom animation
Set the duration to a short time
This visual dynamic effect will make the whooshing sound blend more seamlessly with the video clip, rather than appearing abrupt.
By following these steps, you can achieve a clean, professional-level whooshing sound effect that enhances the opening sequence rather than overshadowing it. After a few practice sessions, you’ll master it, thus speeding up the entire editing process.
Common Mistakes to Avoid
Using a whoosh effect can instantly improve your video, but it’s also easy to overdo or misuse it. Below are the most common mistakes beginners, and even experienced editors make, and how to avoid them.
1. Making the Whoosh Too Loud
This is probably the most common problem. A whoosh is meant to support the visual, not steal attention from it. When the sound is too loud, it can feel jarring and break the viewer’s focus, especially if there’s dialogue or music right after.
How to fix it:
Lower the whoosh volume so it sits under your main audio
Compare it with background music or voice levels
If it grabs your attention more than the video itself, it’s too loud
A good whoosh should be felt more than noticed.
2. Poor Timing at the Start of the Clip
Timing matters more than the sound itself.
Placing the whoosh exactly at the first frame often makes it feel abrupt. On the other hand, placing it too late can make the effect feel disconnected from the visual.
How to fix it:
Start the whoosh a few frames before the clip starts
Let the sound lead into the visual movement
Preview it several times and adjust frame by frame
Smooth timing is what makes the editor feel professional.
3. Using Whoosh Effects Too Often
The power of whooshing sound effects lies in their eye-catching nature. However, if it is used in every scene or transition, it will quickly lose its impact.
Overuse can also make a video sound noisy and tiring to watch.
How to fix it:
Use whooshes only for important moments
Mix in quiet cuts or simple fades
Ask yourself: “Does this moment really require emphasis?”
Less usage often creates a stronger effect.
4. Mismatch Between Sound and Visual Style
Not all whooshing sounds are suitable for all videos.
A heavy, cinematic whooshing sound might be suitable for trailers or dramatic clips, but it could seem out of place in a lighthearted vlog, tutorial, or lifestyle video.
How to fix it:
Match the whoosh style to the video mood
Use lighter, softer whooshes for calm or friendly content
Reserve aggressive sounds for fast-paced or high-energy edits
Consistency in style makes your video feel intentional.
5. Ignoring the Visual Movement
A whooshing sound without any movement often seems meaningless.
If the video itself is static and there are no moving objects, then the whooshing sound can be confusing or unnecessary.
How to fix it:
Add a slight zoom, slide, or fade-in
Use keyframes to create subtle movements.
Be gentle – large movements are not always better.
Sound and movement should be coordinated and integrated.
6. Not Checking the Edit With Headphones
Many timing and volume issues are difficult to detect with mobile phone speakers.
A sound that sounds good on one device may sound harsh or muddy on another.
How to fix it:
Preview your edit with headphones
Test it on both phone and desktop speakers
Adjust the volume until it sounds balanced throughout.
Good editors always check how their audio translations across devices.
When Should You Use a Whoosh Effect?
The whooshing sound effect is best used in scenarios with a clear purpose. In the Latest CapCut Update, it’s perfect for video openings, fast transitions, or moments where you want to convey dynamism or energy. If the video itself is fast-paced, a slight whooshing sound can enhance that feeling. If the video is relatively calm or emotional, it’s usually best to omit it.
Like most editing techniques, the less you use them, the more professional the effect.